
Gather your team.
Collaborate with your team or peers by initiating a virtual whiteboard from within a Zoom meeting.
With Zoom Whiteboard, you can brainstorm and collaborate on a persistent, expandable, digital canvas. In-person and remote teams can ideate from Zoom-enabled devices, providing you and your team with the intuitive features you need to collaborate.
Collaborate with your team or peers by initiating a virtual whiteboard from within a Zoom meeting.

Brainstorm fast and efficiently with smart connectors, sticky notes, drawing tools, and comments.
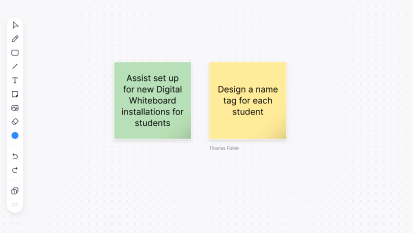
Categorize information in real-time with sticky notes.
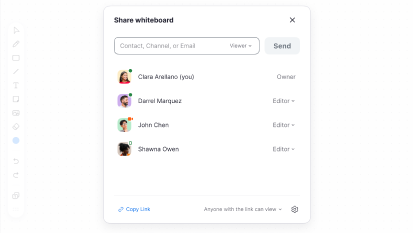
Easily share your online whiteboards with others using the share sheet.
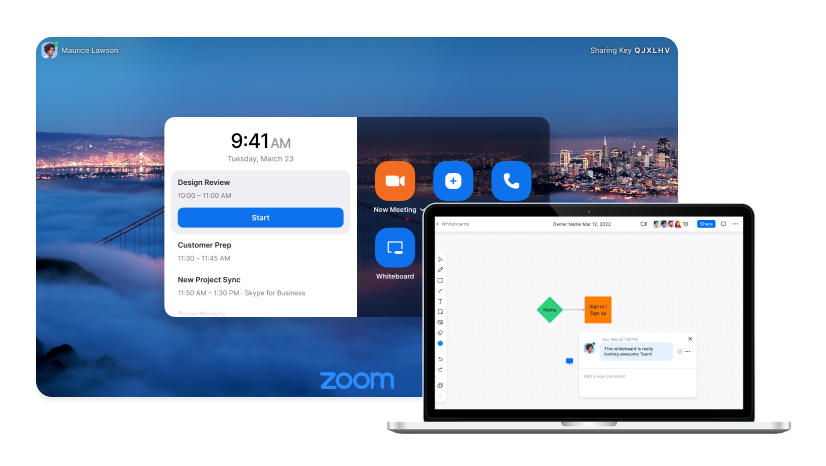
Whiteboard collaboration on your Zoom client for desktop, web browser, or Zoom Room for Touch.
Use Cases
Create a whiteboard wherever you are and collaborate instantly. Share it with anyone who has a Zoom account to work together in real time.Start something now and share it later.
![]() Use built-in whiteboarding tools to expand and clarify your ideas.
Use built-in whiteboarding tools to expand and clarify your ideas.![]() Access your whiteboard from any supported device, including browsers, Zoom clients, and Zoom Rooms for Touch.
Access your whiteboard from any supported device, including browsers, Zoom clients, and Zoom Rooms for Touch.
Zoom Whiteboards support interactive teaching and presentations on all supported Zoom hardware, from laptops to Zoom Rooms for Touch.Designed for instruction and interactive presentations.
![]() Use room size 55" and 65" digital whiteboards to present and collaborate with groups of people.
Use room size 55" and 65" digital whiteboards to present and collaborate with groups of people.![]() Enhance lessons and presentations with touch tools, templates, images, and an extendable workspace.
Enhance lessons and presentations with touch tools, templates, images, and an extendable workspace.
Zoom's existing platform integrates perfectly with Zoom Whiteboard giving everyday Zoom users a whole new tool and a huge advantage when collaborating.
Leverage Zoom's existing platform.
![]() Create and share real-time interactive whiteboards directly within Zoom Meetings, with flexible access controls for participants.
Create and share real-time interactive whiteboards directly within Zoom Meetings, with flexible access controls for participants.![]() Take your workshops to the next level by offering whole new ways to work together using all of what Zoom has to offer.
Take your workshops to the next level by offering whole new ways to work together using all of what Zoom has to offer.
To get started with Zoom Whiteboard, you'll need the latest version or at least the global minimum version of the Zoom app on your device. 
How To Guides
From a Zoom meeting.
1. Start a meeting from the Zoom desktop client.
2. Click the Whiteboard button
![]() on the in-meeting controls.3. Click New Whiteboard.
4. Click the arrow
on the in-meeting controls.3. Click New Whiteboard.
4. Click the arrow
![]() next to All Participants can edit to choose what permissions you would like participants to have.5. Click Open and Collaborate.
6. The whiteboard will open in your meeting window.
next to All Participants can edit to choose what permissions you would like participants to have.5. Click Open and Collaborate.
6. The whiteboard will open in your meeting window.
1. Once you have created a whiteboard, click Share at the top right to send the whiteboard to others.
2. Enter the email addresses of the people you would like to share the whiteboard with and set their permissions. Click Send.
3. Alternatively, click Copy Link and then paste the link in a message or email to send to others.
Managing, Accessing, and Deleting Whiteboards from the Zoom Desktop Client
![]() at the top right.
at the top right.
![]() icon next to the whiteboard you want to manage, then choose from the following options:
icon next to the whiteboard you want to manage, then choose from the following options:
When sharing a Zoom whiteboard, select the red X in the pop-up bar. See screengrab below for reference.
Whiteboard tools are located on the left of the screen. Click an icon to activate a tool; your cursor will change to show the selected mode.
Click on the canvas to create objects or use the Select tool to modify objects' properties.
See Zoom’s Whiteboard tools guide for more details on each tool.
To see how you can enhance your team's collaboration and take your brainstorming sessions to the next level, visit Zoom's Whiteboard support page.